
A successful wood floor restoration project starts long before the sanding machine is switched on. From assessing the condition of the timber to organising equipment, abrasives and finishing products, proper preparation can make a significant difference to the efficiency and quality of the finished job.
For flooring contractors considering floor sanding machine hire, planning ahead is particularly important. Hiring professional equipment gives you access to high-quality machinery without the upfront investment of purchasing, but making the most of your hire period means having everything ready before the machines arrive.
Here are the key things to consider before starting your next floor sanding project.
1. Assess the Condition of the Existing Floor
Before arranging any equipment, take time to inspect the wooden floor and identify the work required.
Consider whether you are dealing with solid wood, engineered flooring or parquet, as different floors can require different approaches to sanding and restoration.
Look for signs of damage, loose boards, old coatings, uneven surfaces and gaps that may need repairing. You should also establish whether the floor has sufficient timber thickness or wear layer remaining to be safely sanded.
Identifying these issues early allows you to plan the correct preparation work and avoid unexpected delays once the project begins.
2. Prepare the Working Area
Proper site preparation is essential when carrying out professional wood floor sanding.
Before starting, ensure the working area is clear of furniture, loose objects and anything that could obstruct the machinery. Check for protruding nails or fixings, secure loose boards and arrange any necessary repairs.
It is also important to consider access, electrical supply, ventilation and protecting nearby areas from dust.
Taking care of these details before your floor sanding equipment hire begins helps maximise the time available for the actual sanding work.
3. Plan the Different Stages of Sanding
Professional wood floor sanding typically involves several stages, from removing old finishes to refining the timber surface before applying a new coating.
Each stage may require different equipment.
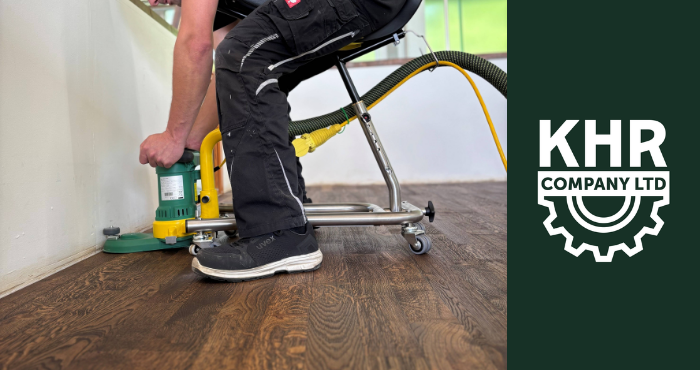
For example, the Lägler HUMMEL is commonly used for sanding larger open areas, while the Lägler FLIP allows contractors to work around edges, corners and other difficult-to-reach areas. The Lägler TRIO is designed for intermediate and finishing sanding, helping prepare the surface for oils, stains and lacquers.
These machines are available through KHR's professional hire service, allowing experienced contractors to arrange suitable equipment for their projects.
Understanding the sanding process in advance helps you organise the correct machinery and avoid unnecessary interruptions during the job.
4. Make Sure You Have Enough Abrasives
Running out of sanding belts, discs or other consumables halfway through a project can cause unnecessary delays.
Before arranging floor sander hire, calculate the approximate floor area and consider the condition of the timber. Heavily worn floors or surfaces with multiple layers of old finishes may require additional sanding stages.
Choose the appropriate abrasive types, sizes and grit grades for your equipment and the work involved.
KHR supplies a comprehensive range of Lägler abrasives, including sanding belts, discs and screens designed for professional floor sanding applications.
Having the correct abrasives ready before starting will help maintain productivity and achieve more consistent results throughout the sanding process.
5. Arrange Dust Control and Safety Equipment
Dust control is an important consideration for any wood floor sanding project.
Professional machines are designed with dust collection systems to help reduce airborne particles, but bags and extraction equipment must be correctly fitted, maintained and emptied safely.
Contractors should also ensure they have appropriate personal protective equipment, including hearing protection and suitable respiratory protection.
Check the condition of all equipment before starting and follow the manufacturer's guidance for safe operation and maintenance.
6. Consider How Long You Need the Equipment
One of the advantages of floor sanding machine hire is the flexibility to access professional equipment for specific projects.
KHR offers Lägler floor sanding machines for hire from one day to three weeks, making the service suitable for a range of professional flooring jobs.
When planning your hire period, consider the size and condition of the floor, the number of sanding stages required and the time needed for repairs or preparation.
It is also worth allowing some flexibility for unexpected issues that may arise during restoration.
KHR's hire machines can be collected from its Southampton depot or delivered at an additional cost by pallet freight throughout mainland UK. Booking in advance is recommended, particularly during busy periods.
Important: KHR's direct hire service is intended for experienced UK floor sanding businesses and tradespeople who have completed Lägler-certified PST training or can demonstrate suitable practical knowledge of Lägler equipment.
7. Organise Your Floor Finishing Products
Sanding is only part of a successful wood floor restoration project.
Once the floor has been sanded and prepared, the timber will usually require a suitable protective finish.
Depending on the project, this might involve applying a wood floor oil, hardwax oil, primer, lacquer or stain.
Make sure your chosen products are compatible with the timber and application requirements, and check the recommended drying and curing times before scheduling the next stage of work.
KHR supplies a wide selection of professional wood floor finishes, helping contractors organise the materials required for the complete restoration process.
Your Floor Sanding Preparation Checklist
Before your next project, make sure you have:
-
Inspected the floor and identified any repairs required.
-
Cleared and prepared the working area.
-
Planned the sanding stages and equipment requirements.
-
Ordered the appropriate abrasives and consumables.
-
Arranged suitable dust control and safety equipment.
-
Confirmed hire dates, delivery or collection arrangements.
-
Selected the wood floor finishing products needed for the job.
Completing these steps before work begins can help reduce downtime, improve efficiency and keep the project running smoothly.
Hire Professional Floor Sanding Machines from KHR
Whether you are restoring a residential wooden floor or preparing for a larger commercial renovation, the right combination of preparation, equipment and materials can make a considerable difference to the finished result.
For professional contractors who require reliable machinery without purchasing additional equipment, Lägler floor sanding machine hire provides a practical solution.
KHR offers access to professional Lägler HUMMEL, FLIP and TRIO machines, alongside expert technical advice, abrasives and wood floor finishing products.
Need a floor sanding machine for hire? Explore KHR's Lägler floor sanding machine hire service or contact the team to discuss availability and your project requirements.